Wednesday, February 4, 2015

A "MOOD" ADVENTURE


I am so proud to be a part of a very artistic family, not all of whom are artistic in the same vein.  For instance, I love to refurbish furniture and find new ways and new colors to bring new life to old pieces.  My youngest happens to have found her passion in fashion design (or for now, sewing)!  She asked for a sewing machine Christmas 2013 and it took off from there.  She started by learning how to sew from YouTube videos, with pencil pouches as her first project.  We all got pencil pouches, whether we needed one or not;  HA! Once she nailed those, she moved on to making aprons for friends and family by recycling thrift store clothing.  This is where my passion for thrift store shopping really began.  I guess I have my youngest to thank for that. J

 
Her next project was a cute top.  This was the first time she picked out her own fabric at a store.  She wanted a vintage 50’s type look.  Remember Annette Funicello in her early 60’s beach movies?  Wow, I must really be dating myself, but I guess if you remember it too...  J
 
 
After seeing Chloe wear the clothes she made to school (including a few skirts), her choir teacher asked if we (more like Chloe, since I don’t sew) could make 32 sashes for the new choir dresses.  That turned into a huge project!  We had an assembly line of fabric cutters while Chloe did the sewing.  They turned out rather nicely, don’t you think?
 

 Finally, after taking some local sewing classes, she went on an adventure to the well -known “Mood” fabric store in Los Angeles.  Well, I know that the New York store is a lot more popular thanks to Project Runway, but where do you think the fabric comes from when the designer’s debut their Academy Award winning designs??  L.A. MOOD of course.  Okay, probably Paris, but one can dream, right?
 
 
Chloe’s all-day road trip to several fabric stores in Los Angeles was truly an inspirational day for her! One of the highlights though, was getting to meet “Oscar”, Mood’s mascot, a cute little Chihuahua mix.


Her trip was an amazing success.
 

So, after some hard work and HOURS of sewing….voila!

 
I really love the fabric that she chose, and am very impressed with her attention to detail; did you notice the placement of the design on the bodice?  Great job Chloe!! (Hair with the flower is compliments of my oldest daughter. J)
 
 From a proud mom (please excuse my boasting – I just HAD to share),
 
Debbie


Monday, January 26, 2015

ANY SHADE OF BLUE

I wanted to tell you a little bit about how I got started with my new exciting hobby.  My youngest daughter started sewing and needed a sewing desk with enough drawer space to hold all of her supplies.  After a long (but exhilarating) day of thrift store shopping, we found this beautiful piece.  I couldn't leave without it!  I probably paid more than I should have, but it had to be mine. I would have loved to know the history behind it, and if the donator had painted and refurbished it themselves or if they too purchased it somewhere after enjoying its beauty. 


After staring at the desk for several weeks, I decided that I could create my own beautiful pieces.  Why pay more for what you can do yourself?! I was in need of my own desk to fit in a small space between our dining and living rooms.  I currently had a small curio cabinet in this space (chicken wire project that I will post soon) with a large portrait of my three girls taken at the beach hung over it.  I found a nice secretary desk on Craigslist for $50.  I thought that was a fair since it was in great shape.  I just had to fill in a few marks with wood filler, do a little sanding, and it was ready for my first chalk painting experience. 
  

I was a little nervous about what color to choose as I wanted it to stand out rather than match my other decor.  One good thing about chalk paint is that if you don’t like the way it turns out, you can repaint it again and again until you get it just right (think Goldilocks.)  After some thought, I chose a grey/blue – almost a faded jean color (you know…the color of your old 501 Levi jeans that faded after a million washes?) I wasn't sure I liked the color when I finished painting. It was a little too bright-looking to me, but after sealing it with my own homemade dark wax, and giving it a little distressed look, I was really happy with the way it turned out. 


After finishing the desk and placing it in its spot underneath my beautiful girls’ portrait, I decided to start another project to create a “family” wall. So, I moved their picture to a different spot, and changed up the decor over my new piece with some great garage sale finds.  I love the color contrast with the rest of the room, and the great storage I now have (who doesn't need more storage?)!


What color did you choose for your favorite furniture makeover?

Debbie


Wednesday, January 14, 2015

A LITTLE RED DESK (BEFORE & AFTER)

After dabbling with chalk paint on a few of my own personal furniture pieces, I was very excited to search for some treasures in my first garage sale adventure.  At my very first stop, I found an adorable, vintage (mid 1900’s), child’s roll-top desk and matching chair.  I couldn’t believe they were getting rid of it!  I asked for some history on the piece.  The seller informed me that it belonged to his grandfather, and that he had used it as a kid. Since his grandfather was in the military, the little desk had moved around a lot but seemed to be in great shape, considering.   According to the seller, the desk had belonged to his grandfather while he was in the military.  Stickers reading “Beverly Hills”…and several other cities where he had been stationed lined the back panel.  It was apparent by the wear and tear that this desk was as well-traveled as its owner.  I couldn’t leave it sitting there, and was able to talk him into giving it to me for $20.  Such a steal!  


After bringing it home, I couldn’t wait to get my hands on it, but once I really took a look at it, I thought “what now”?  This was my first real attempt at renovating a furniture piece that wasn’t already in great condition.  I’m no expert, and definitely not a craftsman (craftswoman ☺).  I figured, “how hard can it be?  It is just a little desk.”  It definitely had its challenges, from trying to remove the back without breaking it, to having to take the roll top off and completely re-doing it from scratch.  I was so excited for the challenge!  Once I carefully removed the back panel, a lot of kid’s Lion King playing cards, colored pencils and other dated trinkets came falling out.  I couldn’t help but stop to examine the history that I had just stumbled upon, which only enhanced my new found love for this piece.  
 
 
After removing the back panel, I took the roll-top out and began dismantling it.  The fabric was old and falling apart, causing it to not roll up and down properly.  I made sure to keep the wooden slats in order.  I cleaned them off and then watched a video on how to put it back together.  Most Youtube videos showed the process with woodworking equipment that I definitely don’t have, so I ended up borrowing a “square” (L-shaped ruler) to help me line up the wooden pieces properly.  I stole some of my daughter’s fabric from her sewing stash (Shh…don’t tell her) and glued each piece back together.  I was really pleased with the way it turned out considering I only used a square and nothing else.


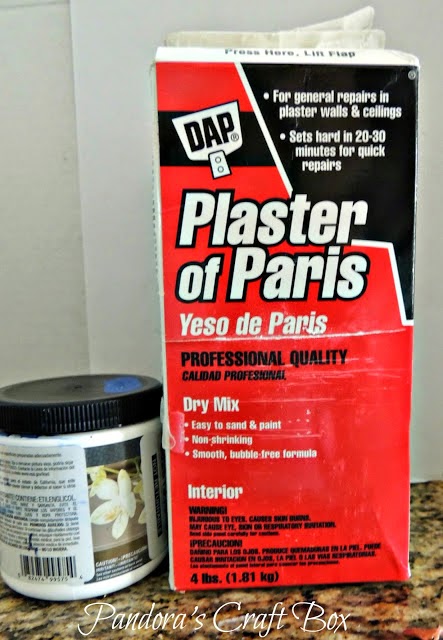
 I cleaned all the YEARS worth of dust off the desk and started painting. From the moment I first saw the desk, I pictured an old red school house, and just went with it. I picked a sample of Behr’s Firecracker red color from Home Depot and created my own chalk paint using the following recipe:

1/3 cup of Plaster of Paris 
1/3 cup of water
1 cup of Paint

The sample size was enough to paint two coats on the desk with a little bit left over for any touch ups.  I really liked the bright red color since it made the piece pop! 
 
Once the paint dried, I did a little distressing all over for a bit of an aged look; it IS old, after all.  I then cleaned all the dust off, and waxed the entire piece with my own dark wax recipe:

2 Tbs Minwax Paste Finishing Wax 
2 Tbs of Minwax Wood Finish Dark Walnut #2716 stain
 
 
I mixed it together on a paper plate until well blended.  You can always add more stain for a deeper wax color, or start off with just 1Tbs, adding more to get just the color to suit you.  I wiped off the wax and let it cure over night. When I got up the next morning, I was SO excited!  I put the desk back together and couldn’t wait to share it with everyone!  Isn’t it cute?   So proud of my finished project—I keep thinking that the grandfather would also be happy to see his treasure renovated and being put to good use.


 Thanks for stopping by!
Debbie